| The MkVII used a very simple key
(look in the section for original ww2 paraset pictures) and if you want to
fit an internal key....rather than a jack socket for an external key you
will need to make one. Here are three photographs of a key that G3YVF makes
which we think are quite effective.
1 The arm is made from a piece of pcb
material. The width adds stiffness to the arm and the two semi-circular indents
are there to reduce the width and forms a "hinge" about which the arm pivots.
Remove pcb material with a round file a bit at a time until you are satisfied
with the "stiffness of the key action" ...... get it right as one cannot
make adjustments here once the key is finished.
|
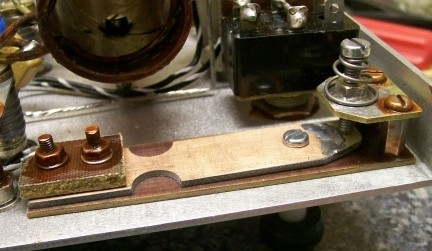 |
| 2 You will notice some solder on
the end of the arm...this was put there to form the electrical contact on
the arm. One could solder an old silver relay contact to the arm to perform
this function if you wish. (A "real" contact is not strictly needed since
we are only keying a very small current, so you do not need to fit a special
contact here if you don't want to.)
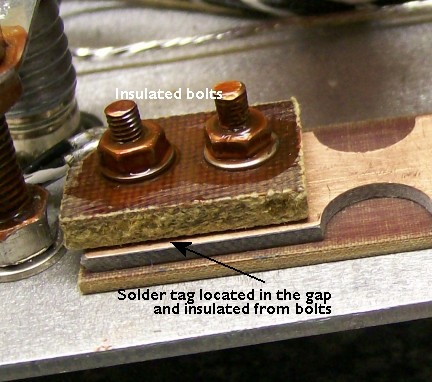
3 Remember the arm needs to be insulated
from earth and a solder connection is required for the wire that connects
to the arm. You can see this in the photos. I actually file the solder tag
from part of the pcb material as I make the arm.
|
 |
| 4 When the key knob is pressed the
arm connects to earth at the end with the spring loaded screw. The spring
is only there so the gap adjustment screw does not "shift" on its own. One
does not need a spring.....a locking nut is just as good and you can lock
the screw with this nut once you have set the gap. I used a spring to allow
me to adjust the gap in the field with only a screwdriver.
|
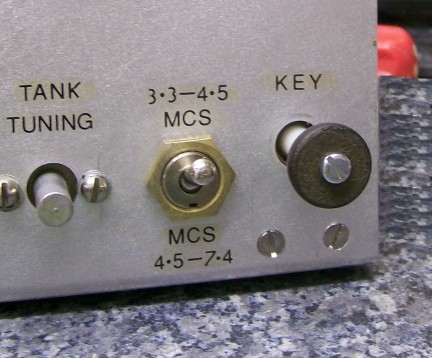 |
| 5 DON'T drill the hole for the key
knob in the pcb material until you have fitted the key to the chassis and
been able to mark the exact position for hole for the knob using the hole
in the chassis for guidance.
6 And the knob? Buy a kitchen cabinet
knob from your local DIY store and "turn" it down in a portable electric
drill chuck using a file. Sand down the finished knob and paint it black
with some enamel paint. Look at the last picture to see the result. |
 |
|
|
|
|
|
|
 2009
2009


